
The Ultimate Guide to Choosing the Best Substrate for Golden Teacher Mushrooms
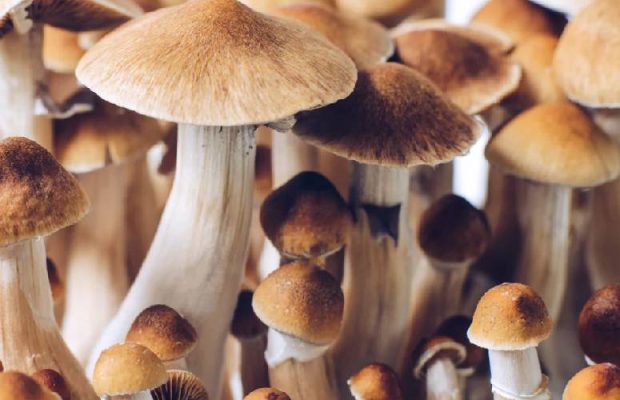
If you’re diving into the fascinating world of mushroom cultivation, you’ve likely come across the Golden Teacher variety. Known for their unique appearance and beginner-friendly nature, Golden Teacher mushrooms are a favorite among home growers. But to get the best results, you need the right substrate. So, what’s the best substrate for Golden Teacher mushrooms? Let’s explore the options and tips to set you up for a successful harvest.
Understanding Substrate Basics
Before we delve into the specifics, let’s clarify what a substrate is. In mushroom cultivation, the substrate is the material on which mushrooms grow. It provides the necessary nutrients for the mycelium (the root-like structure of the fungus) to thrive and eventually produce fruiting bodies – the mushrooms themselves.
Popular Substrate Options
For Golden Teacher mushrooms, several substrates work well. Each has its pros and cons, so the choice depends on your preference, resources, and experience level.
- Brown Rice Flour and Vermiculite:
- Pros: This is a classic choice for beginners due to its simplicity and availability. Brown rice flour provides a rich nutrient base, while vermiculite helps retain moisture.
- Cons: It might not be as nutritious as other options, potentially leading to smaller yields.
- Coco Coir and Vermiculite:
- Pros: Coco coir is an eco-friendly substrate made from coconut husks. When combined with vermiculite, it creates a highly absorbent and airy mix that promotes healthy mycelium growth.
- Cons: It requires proper pasteurization to eliminate any contaminants.
- Manure and Straw:
- Pros: This combination is nutrient-dense, often resulting in robust mushroom growth and high yields. It closely mimics the natural environment of many wild mushrooms.
- Cons: Handling manure can be a bit daunting for beginners, and it requires thorough pasteurization to ensure a contaminant-free substrate.
Preparing Your Substrate
Regardless of the substrate you choose, proper preparation is crucial. Here are the general steps to follow:
- Pasteurization:
- This step involves heating the substrate to kill any unwanted bacteria or mold spores. You can do this by soaking the substrate in hot water or baking it in the oven.
- Mixing:
- Combine the ingredients thoroughly. If you’re using a combination like coco coir and vermiculite, ensure an even mix for consistent moisture and nutrient distribution.
- Hydration:
- The substrate should be moist but not waterlogged. Squeeze a handful; if a few drops of water come out, it’s just right. Too much water can create a breeding ground for contaminants.
Inoculating with Golden Teacher Mushroom Spores
Once your substrate is ready, it’s time to introduce the golden teacher mushroom spores. Sterility is key here. Use sterilized tools and work in a clean environment to avoid contamination. Spread the spores evenly across the substrate, and then place your growing container in a warm, dark place to allow the mycelium to colonize.
Patience and Care
Growing mushrooms requires patience and care. Maintain a consistent temperature and humidity level, and watch for signs of mycelium growth. After a few weeks, you should see the substrate covered in white mycelium. Soon after, small mushrooms (pins) will start to form, eventually growing into the mature Golden Teachers.
Conclusion
Choosing the best substrate for Golden Teacher mushrooms can significantly impact your growing success. Whether you opt for the simplicity of brown rice flour and vermiculite or the nutrient richness of manure and straw, each substrate has its unique benefits. By following proper preparation and inoculation techniques, you’ll be well on your way to enjoying a bountiful harvest of these intriguing mushrooms.

You must be logged in to post a comment Login